How do I make a square hole in (aluminum) sheet metal? 2nd
edition 2019.
By Nick Carter
Why
would you want to make a square or rectangular hole in aluminum sheet
metal? The short answer is that engineers are perverse, thus they
design components with square or rectangular dimensions, which require
you to mount them in a square or rectangular hole. You may also want to
keep a component that slides in or mounts on a hole from rotating, make
a picture frame, or perhaps you just happen to have a round peg that
seems lonely. Look around at all the square and rectangular openings on
your PC or do a Google search for “square hole”, you’ll understand.
The 2019 answer, for me at least, is analog modular synthesizer DIY.
I've
updated this article a bit from the version originally published by
Make: Magazine as their website now seems to be slowly
disintegrating.
Here are some methods depending on the
tools you have and the size of the square hole and the thickness of the
sheet metal.
The first step for all these methods is to
mark where on the sheet you want your square hole, and sometimes the
center of the square. Use either a fine tipped sharpie or a metal
scriber depending on your tolerances. In the pictures I have covered
the sheet metal with layout dye which is thin ink that you can brush or
spray on metal to make a scribed line stand out.
1) If the
aluminum is thin (pop can thickness) you can just pierce the metal with
scissors and cut out the square. For slightly thicker metal you can use
sheet metal shears to cut out the inside of the hole.
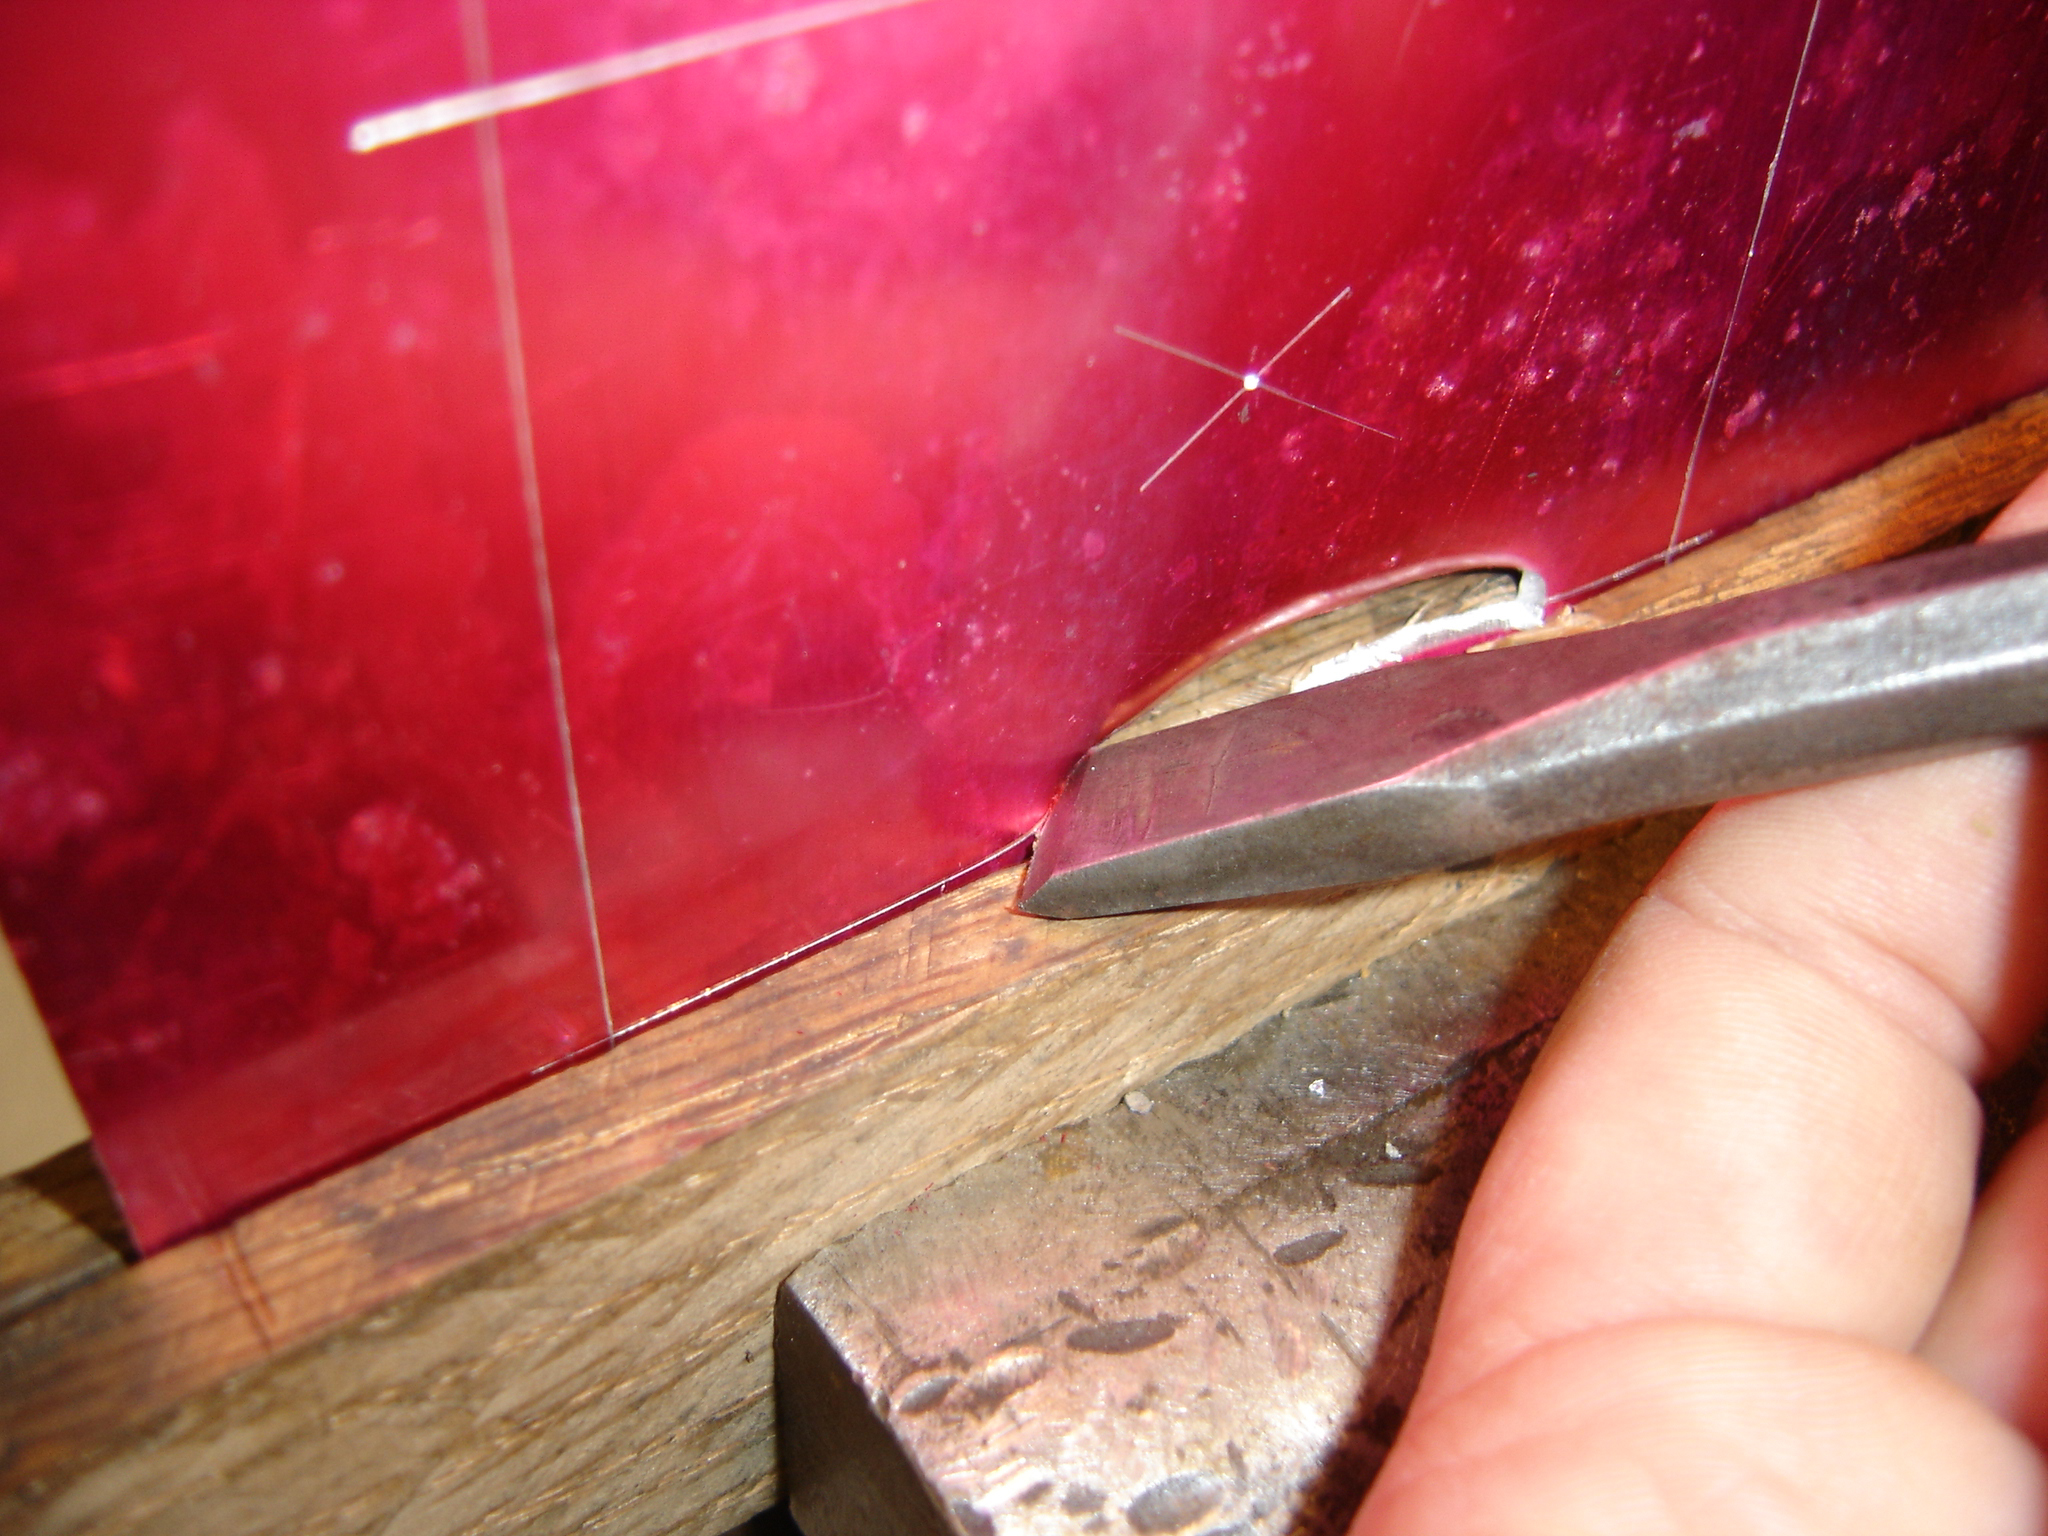
2) You can
shear the hole with a hammer and metal cutting chisel (don't ruin your
wood chisels!). Place the work in a vise with the edge to be cut just
slightly above the vise jaws and hammer the chisel into the work so the
edge of the chisel is parallel to the edge, and held horizontal at
about a 45 degree angle out from the sheet. Do each edge and the square
should pop out. Deburr the edges with a file, and hammer any distortion
flat. Picture #1 shows a chisel cutting one edge of a hole. Notice that
you do get a rather large burr on the cut edge with this method.
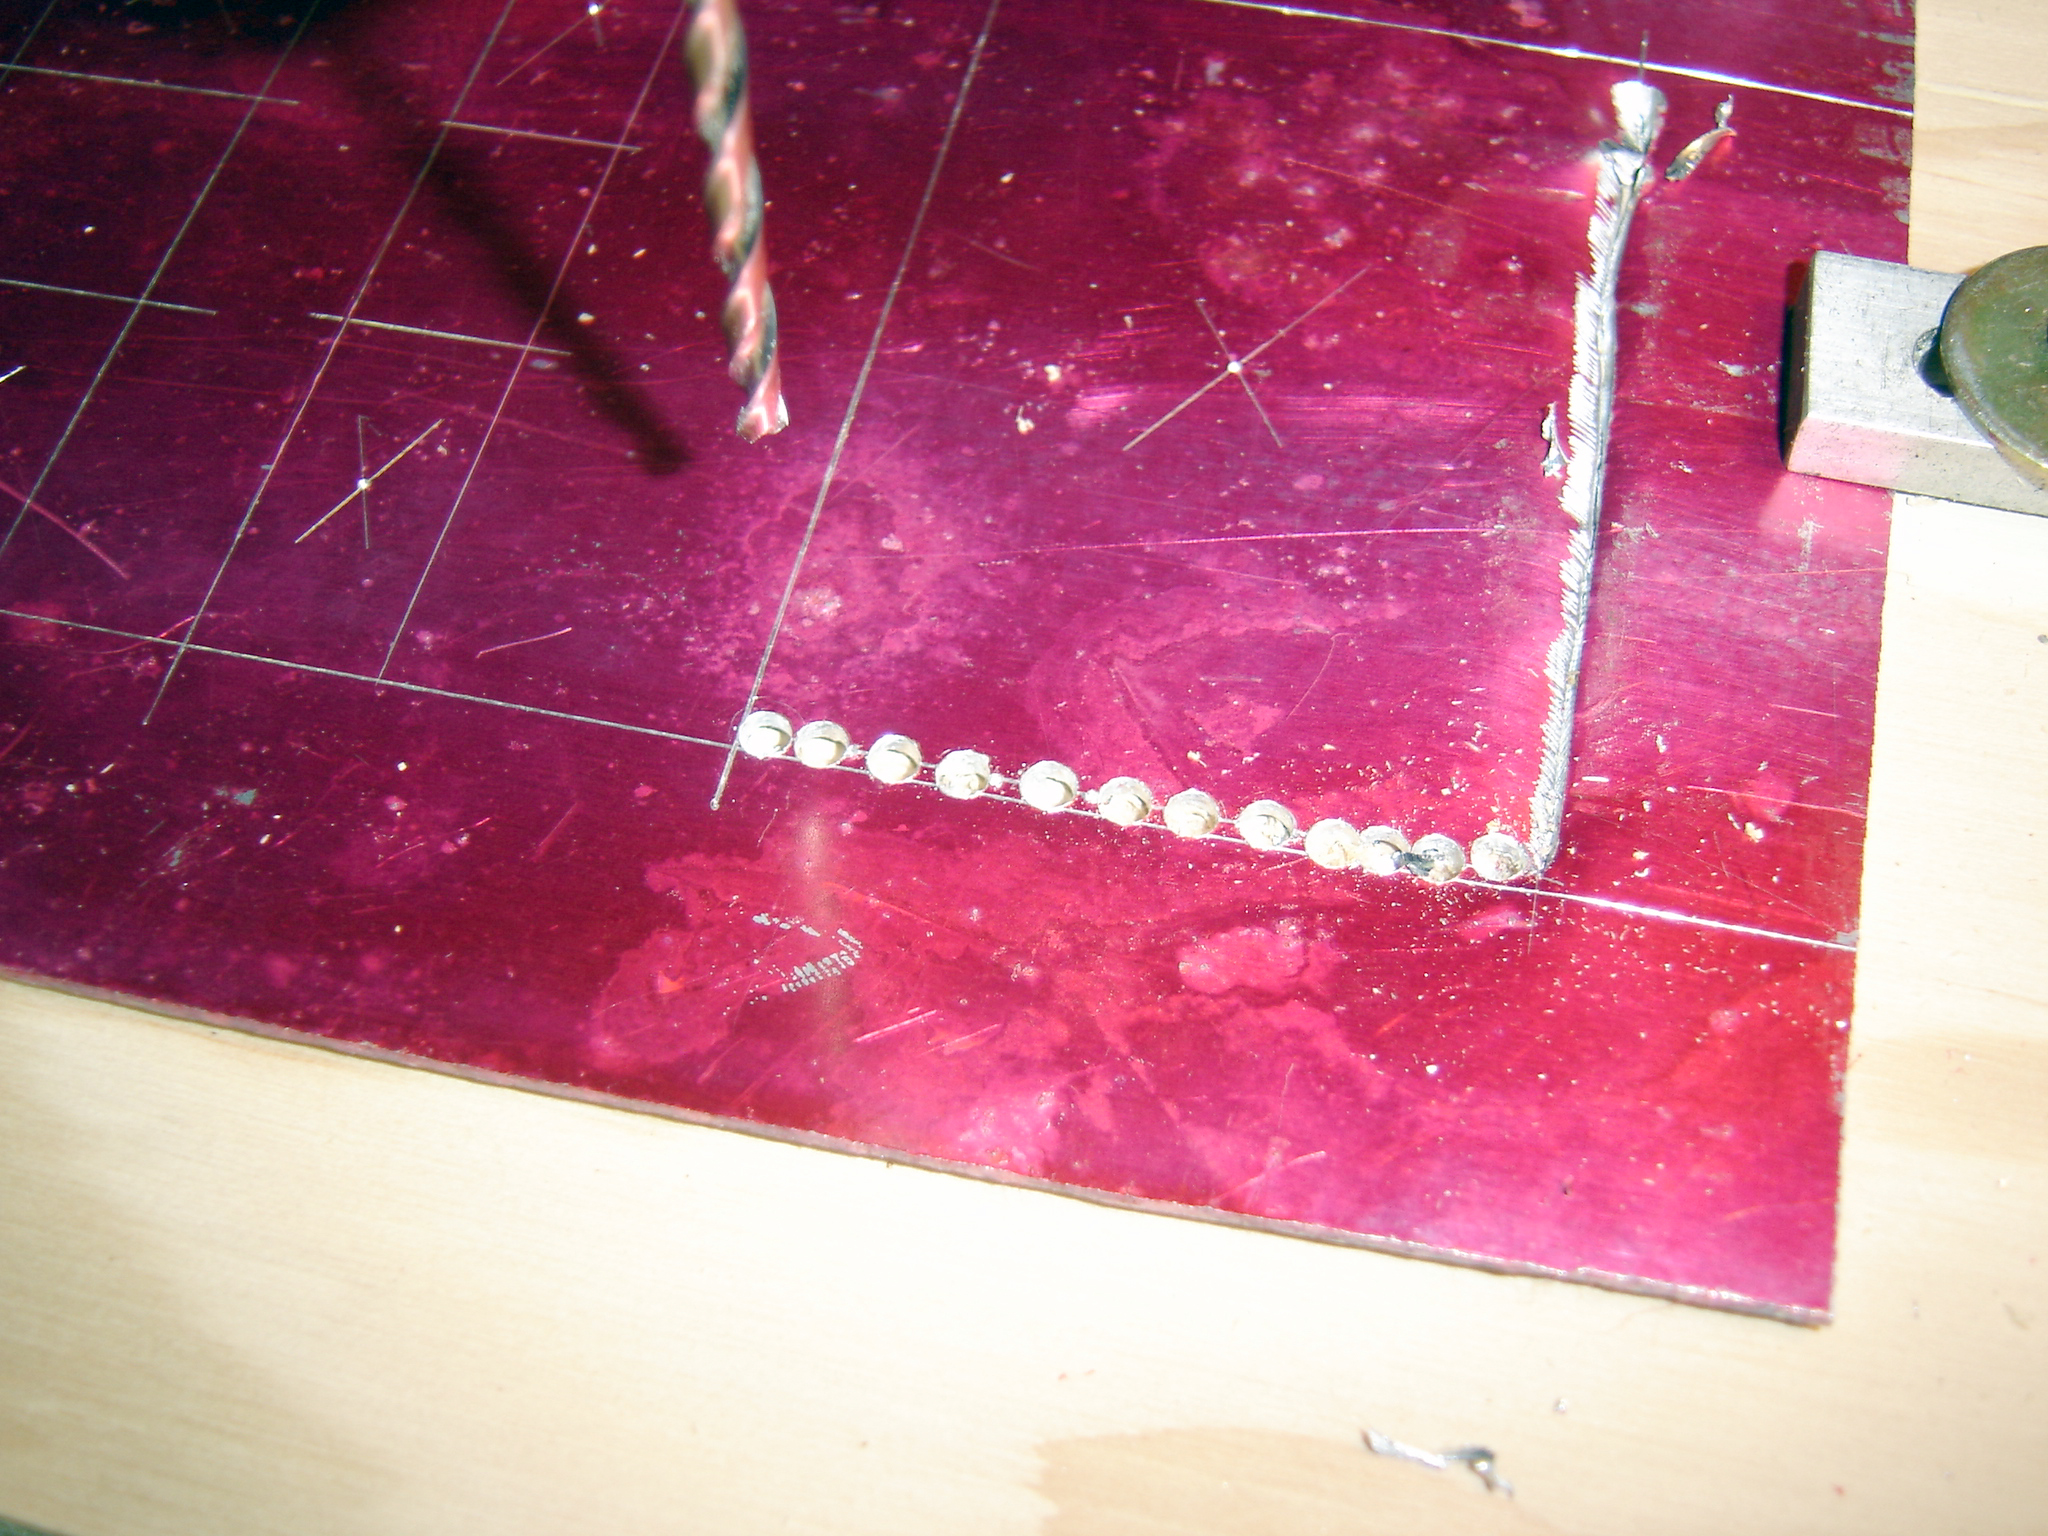
3)
Drill a series of small holes around the periphery of the hole, inside
the edges, and use a shear, saw or chisel to remove the waste, and
again file the edges. This is a good technique on larger holes. Picture
#2 shows a row of holes along the edge of a hole.
4)
Drill out the center of the hole using a "Unibit" sheet metal step
drill and file the edges square. A power file (air or electric) or a
"die filer" could be used to advantage on thicker metal. Picture #3
shows a number of holes drilled with the Unibit chucked up on the drill
press, notice the sheet metal has been mounted to a piece of plywood.
Never, ever hold sheet metal in your hands for drilling it, if the
drill catches on the metal you will end up with a rather scary saw
blade whizzing around that will cut your hands to ribbons!

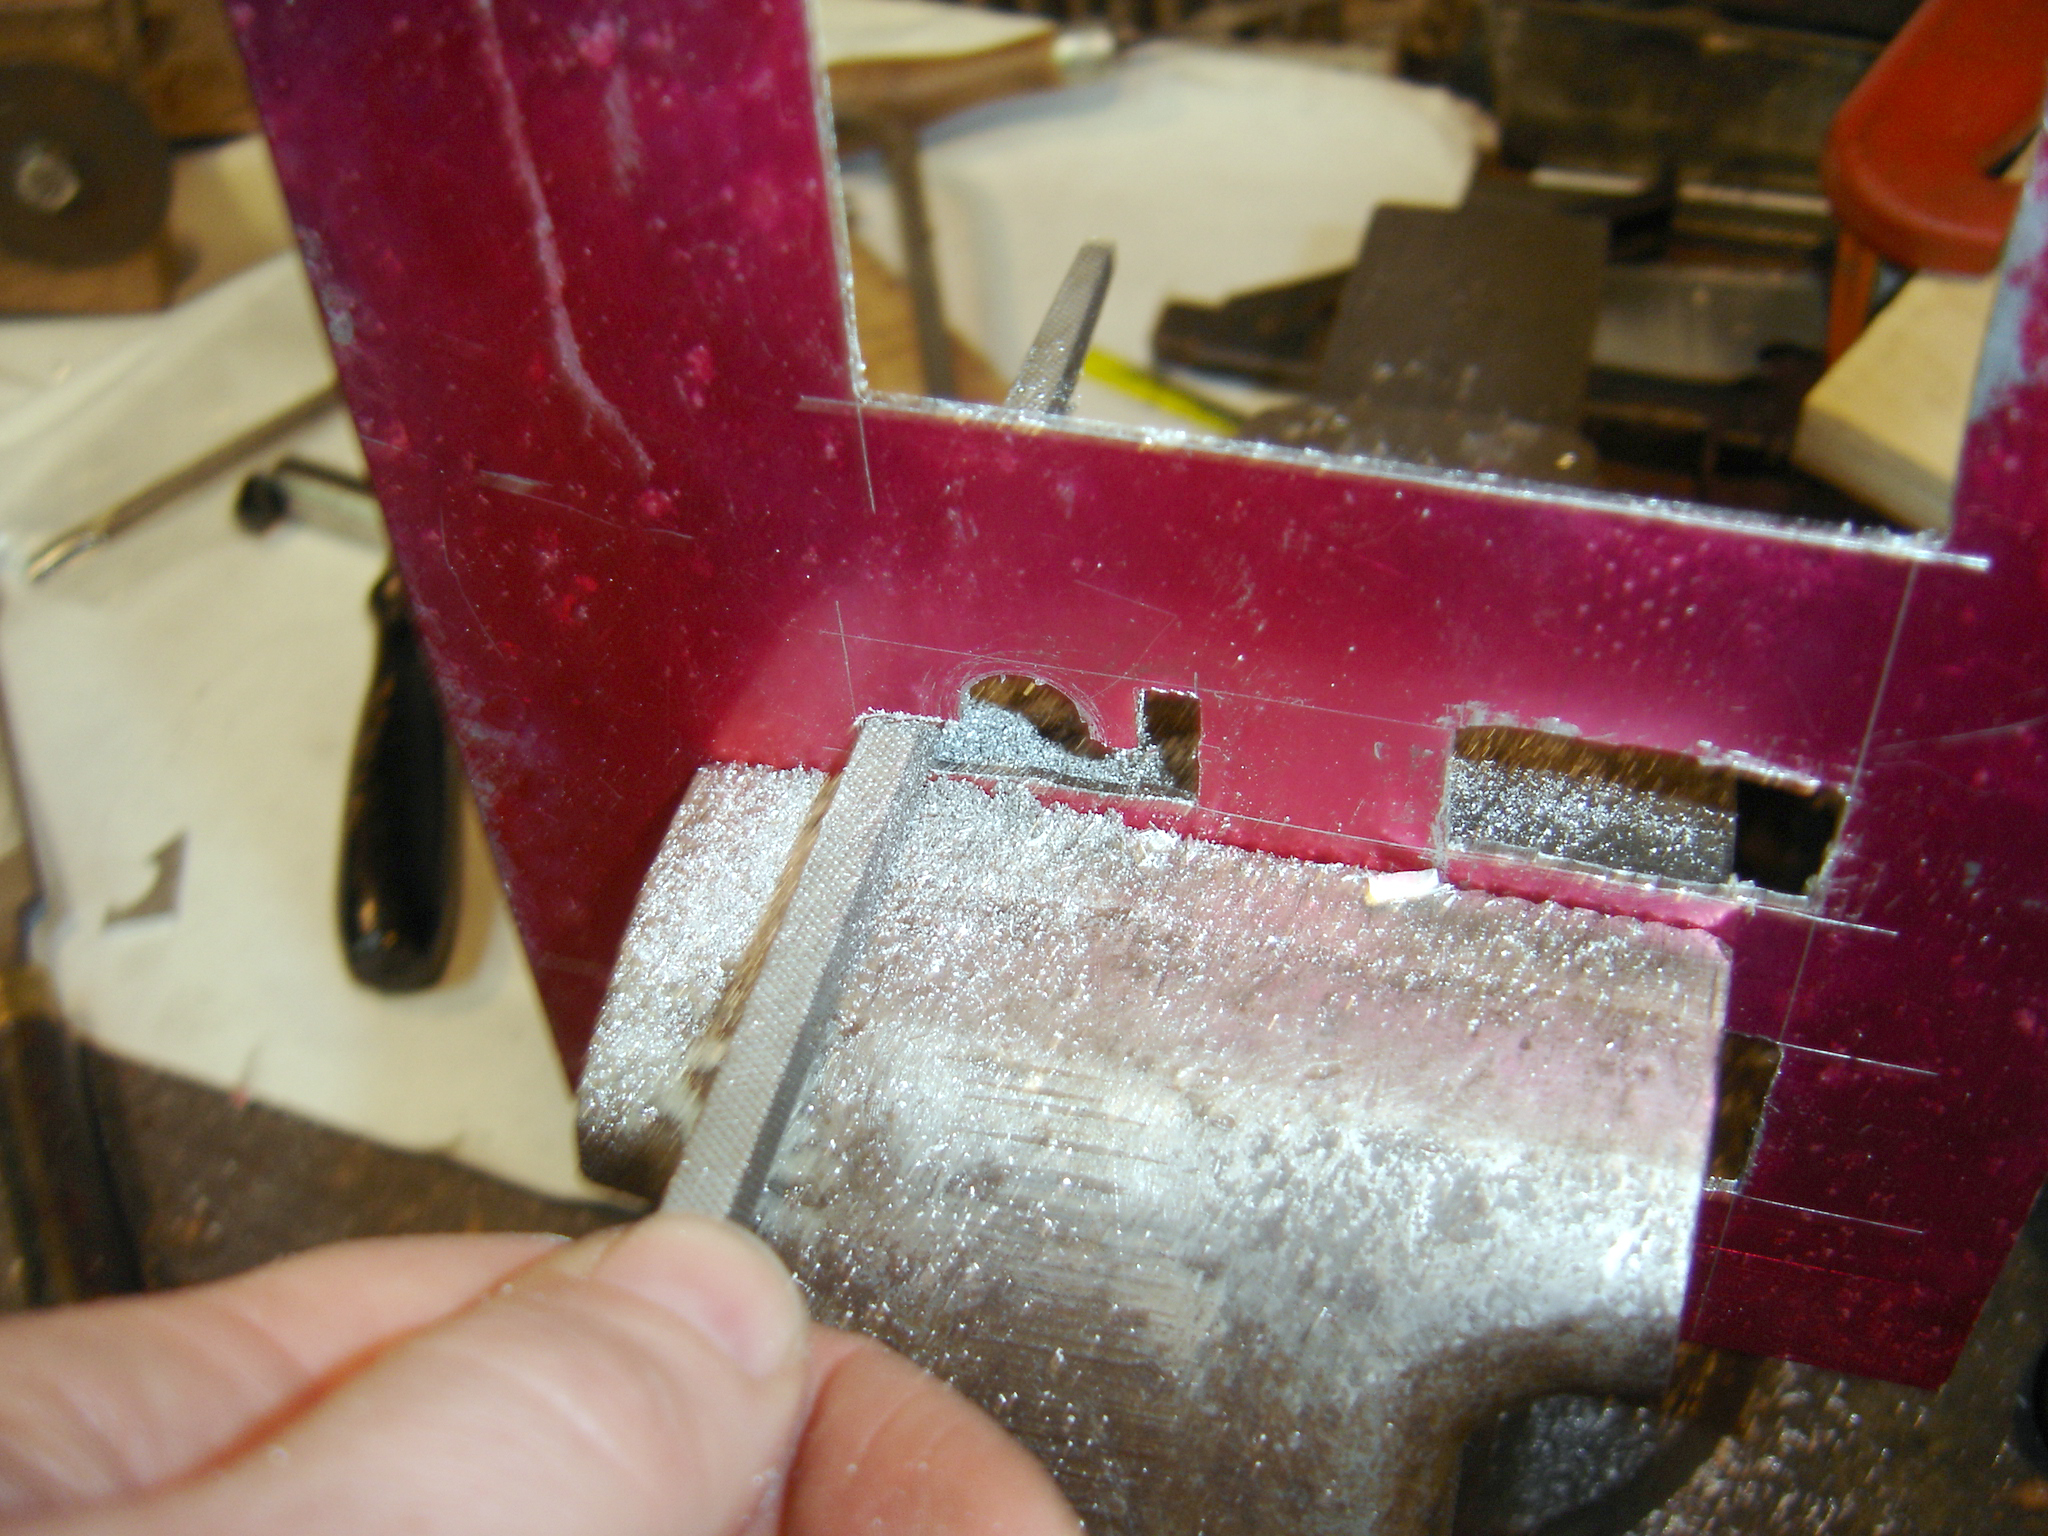
Picture
#4 shows a square file being used to remove the rest of the metal from
the rectangular opening for a switch. This method is surprisingly fast.
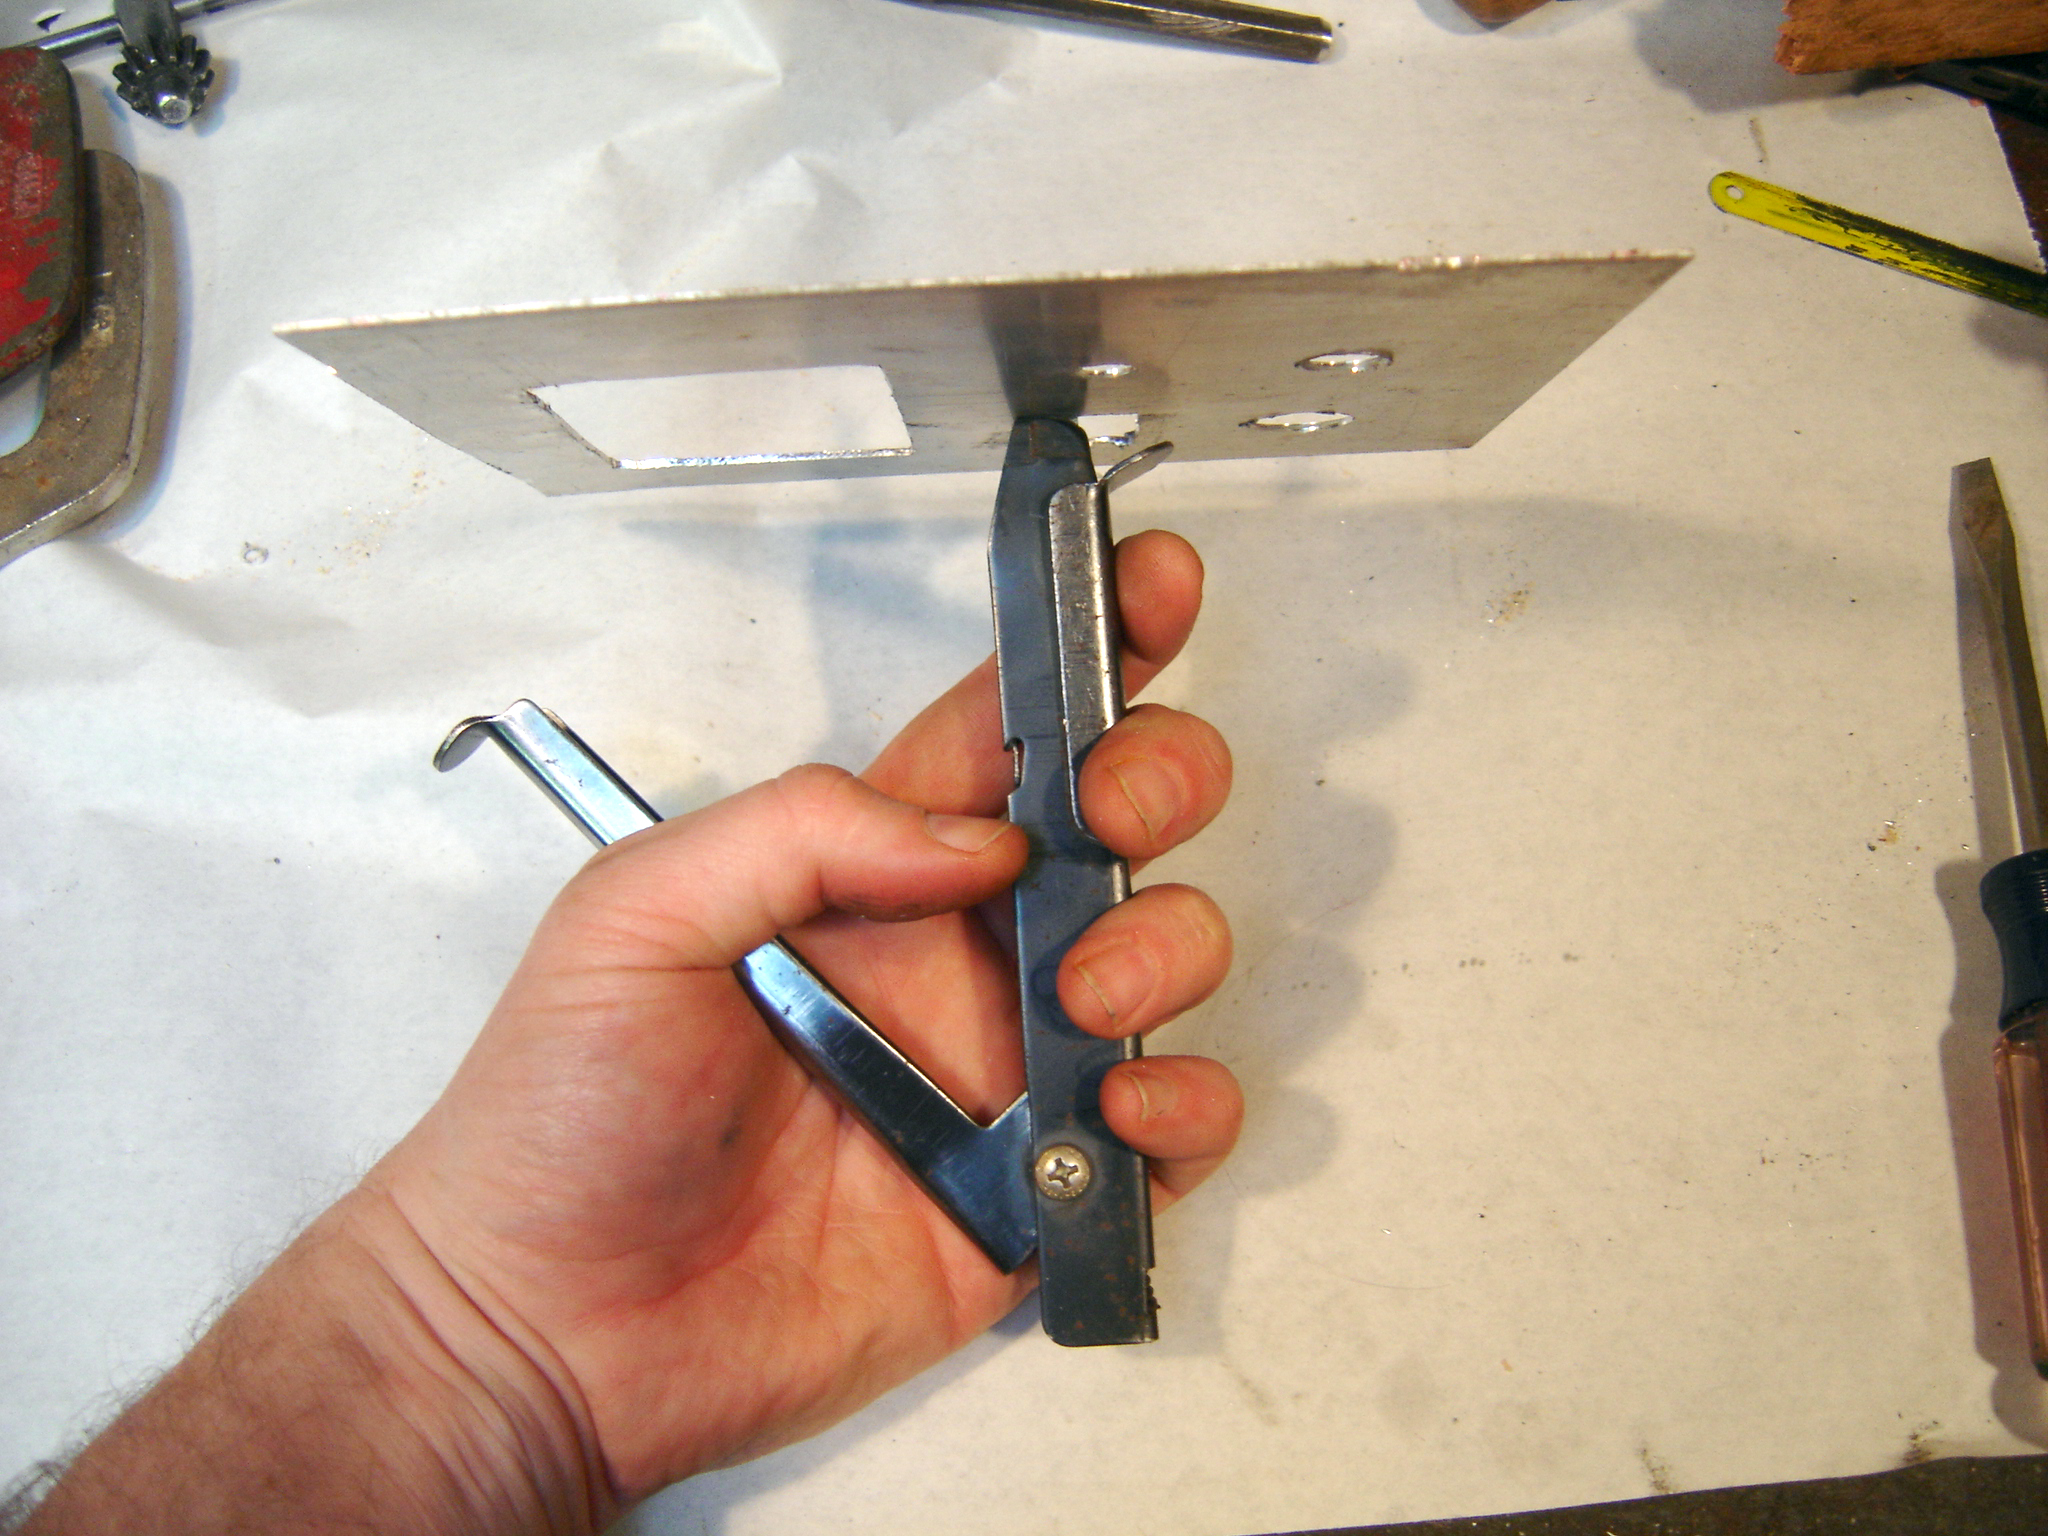
5)
Drill a starter hole and use a hand nibbler like the Klein 76011B
Nibbler Tool. The Nibbler tool is a hand operated square punch and die
that closes on the material when the handle is squeezed. They work well
for electronic panels that need small square openings. In use you
"nibble" along the edge staying on the inside of the line. If the
square hole is relatively large you could also use sheet metal hand
shears or an electric or air powered nibbler. Powered sheet metal tools
are relatively expensive but very versatile. Most major manufacturers
make them. Picture #5 shows the nibbler underneath the metal and
Picture #6 shows the cutting head of the nibbler.
 Revised for 2019.
6)
A jigsaw can be used, drill a hole larger than the saw blade and insert
the blade into the opening. Backing the metal edge with some thin
plywood will prevent the metal bending from the force of the blade.
Picture #7 shows a jigsaw cutting the edge of a hole.

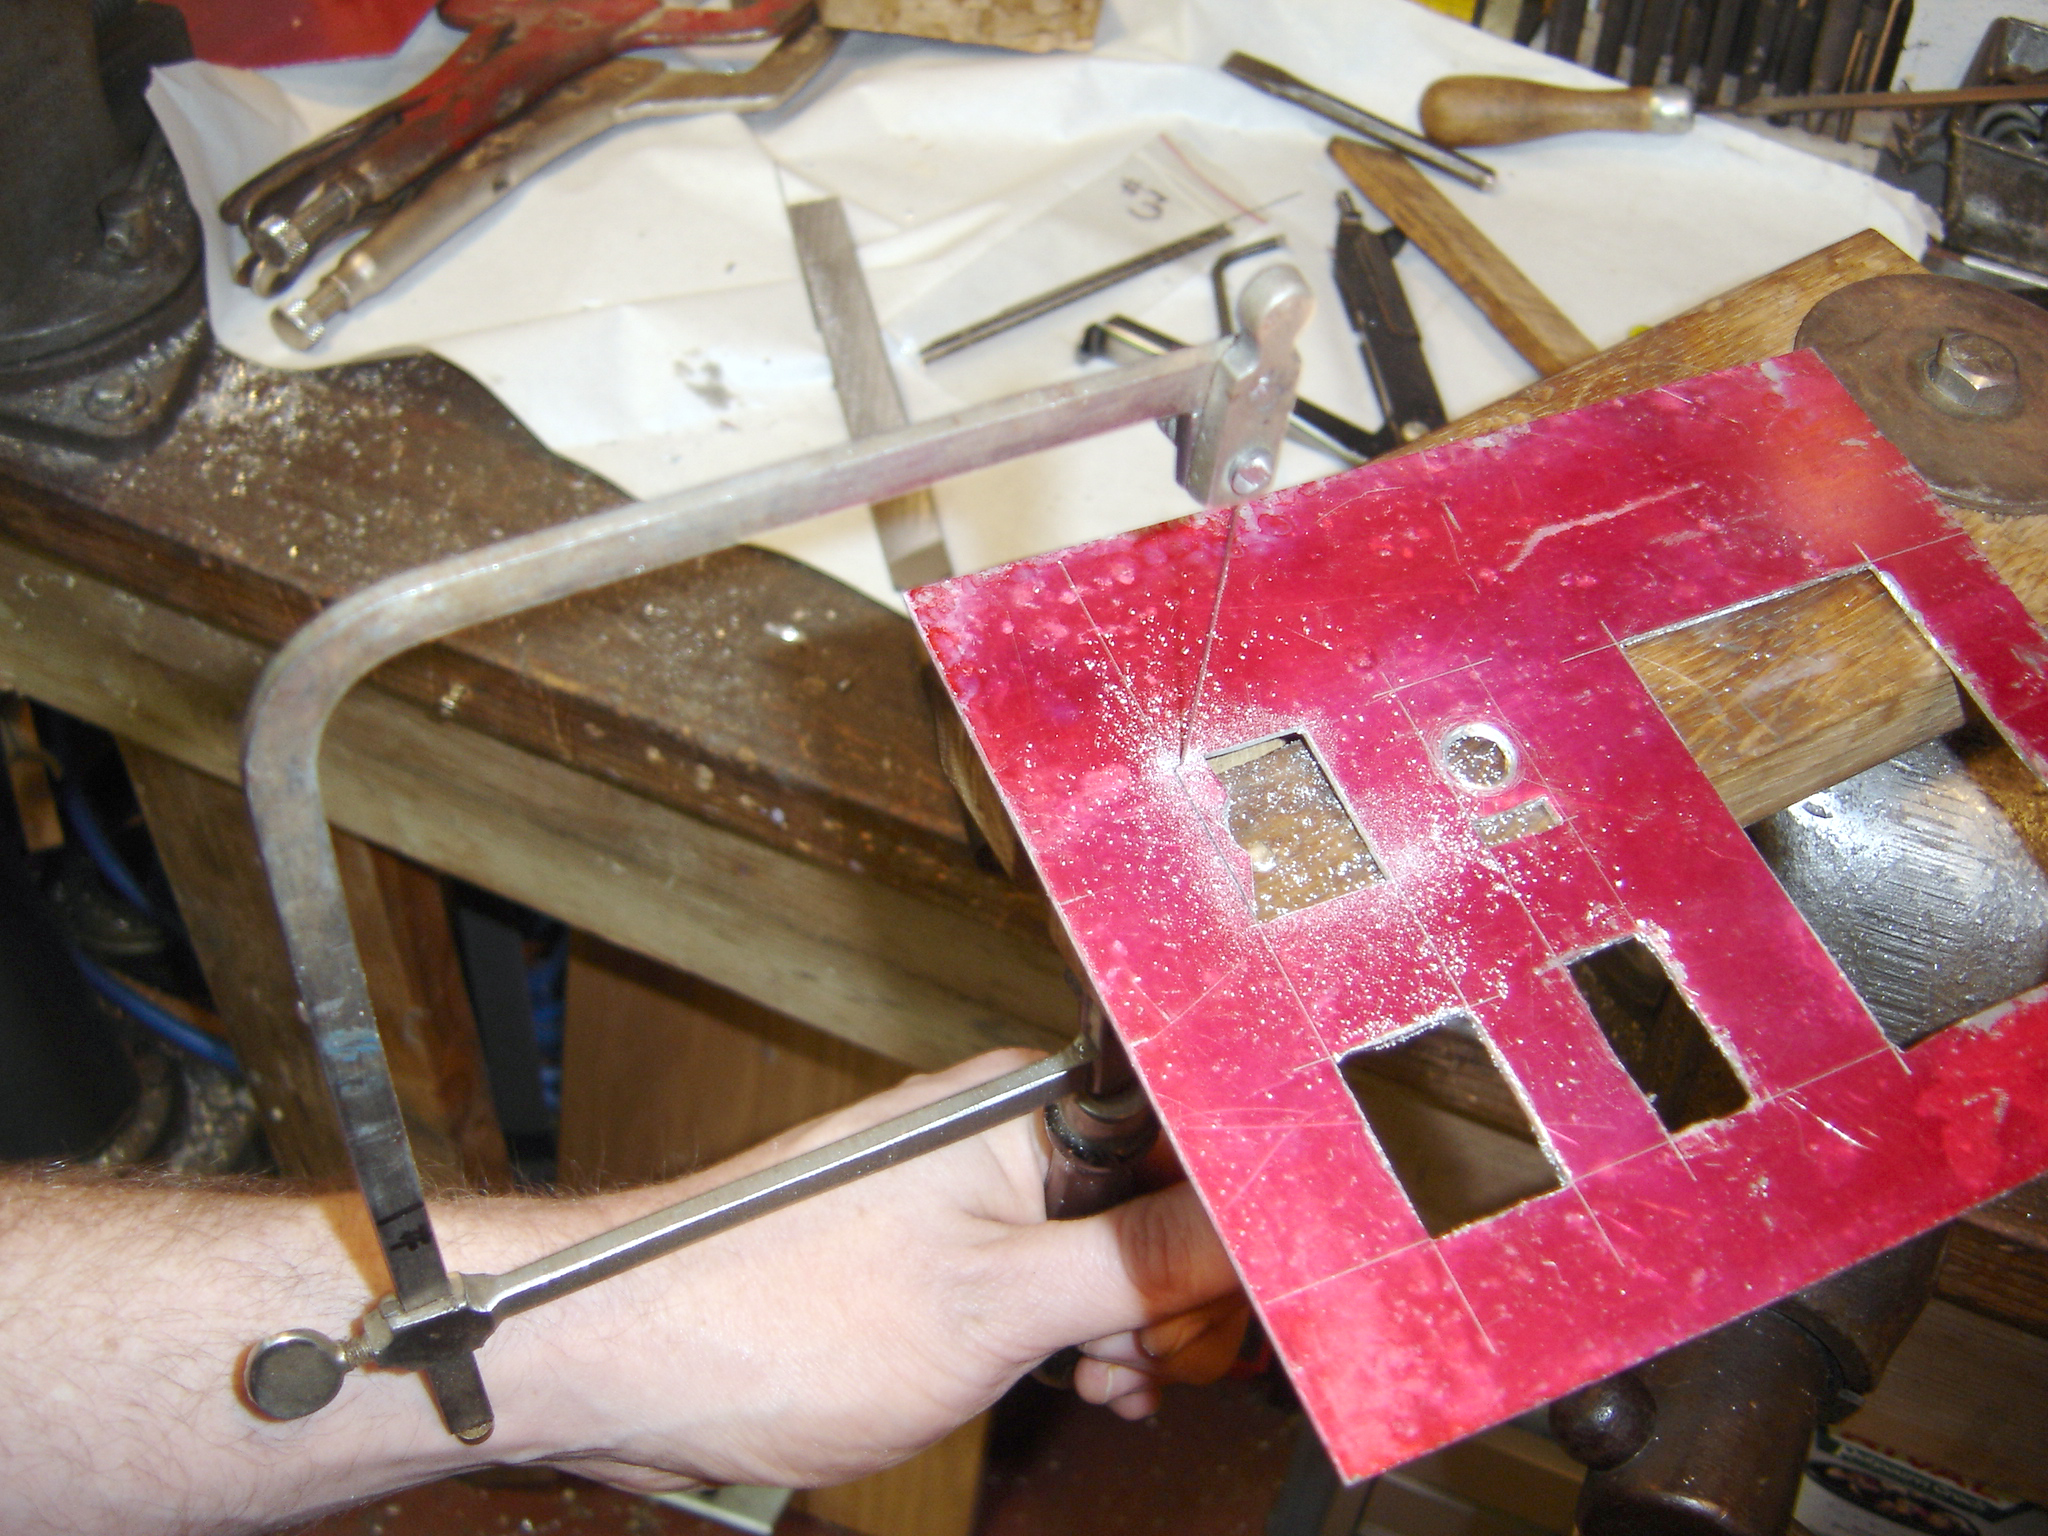
A
jeweler’s handsaw will work quite well for thin metal and small holes.
Use a jeweler’s bench pin to support the work and finish the hole with
files. I had great success with this method as the saw allows great
control and a fine cut. Picture #8 shows the jewelers saw cutting out
the waste from a hole.
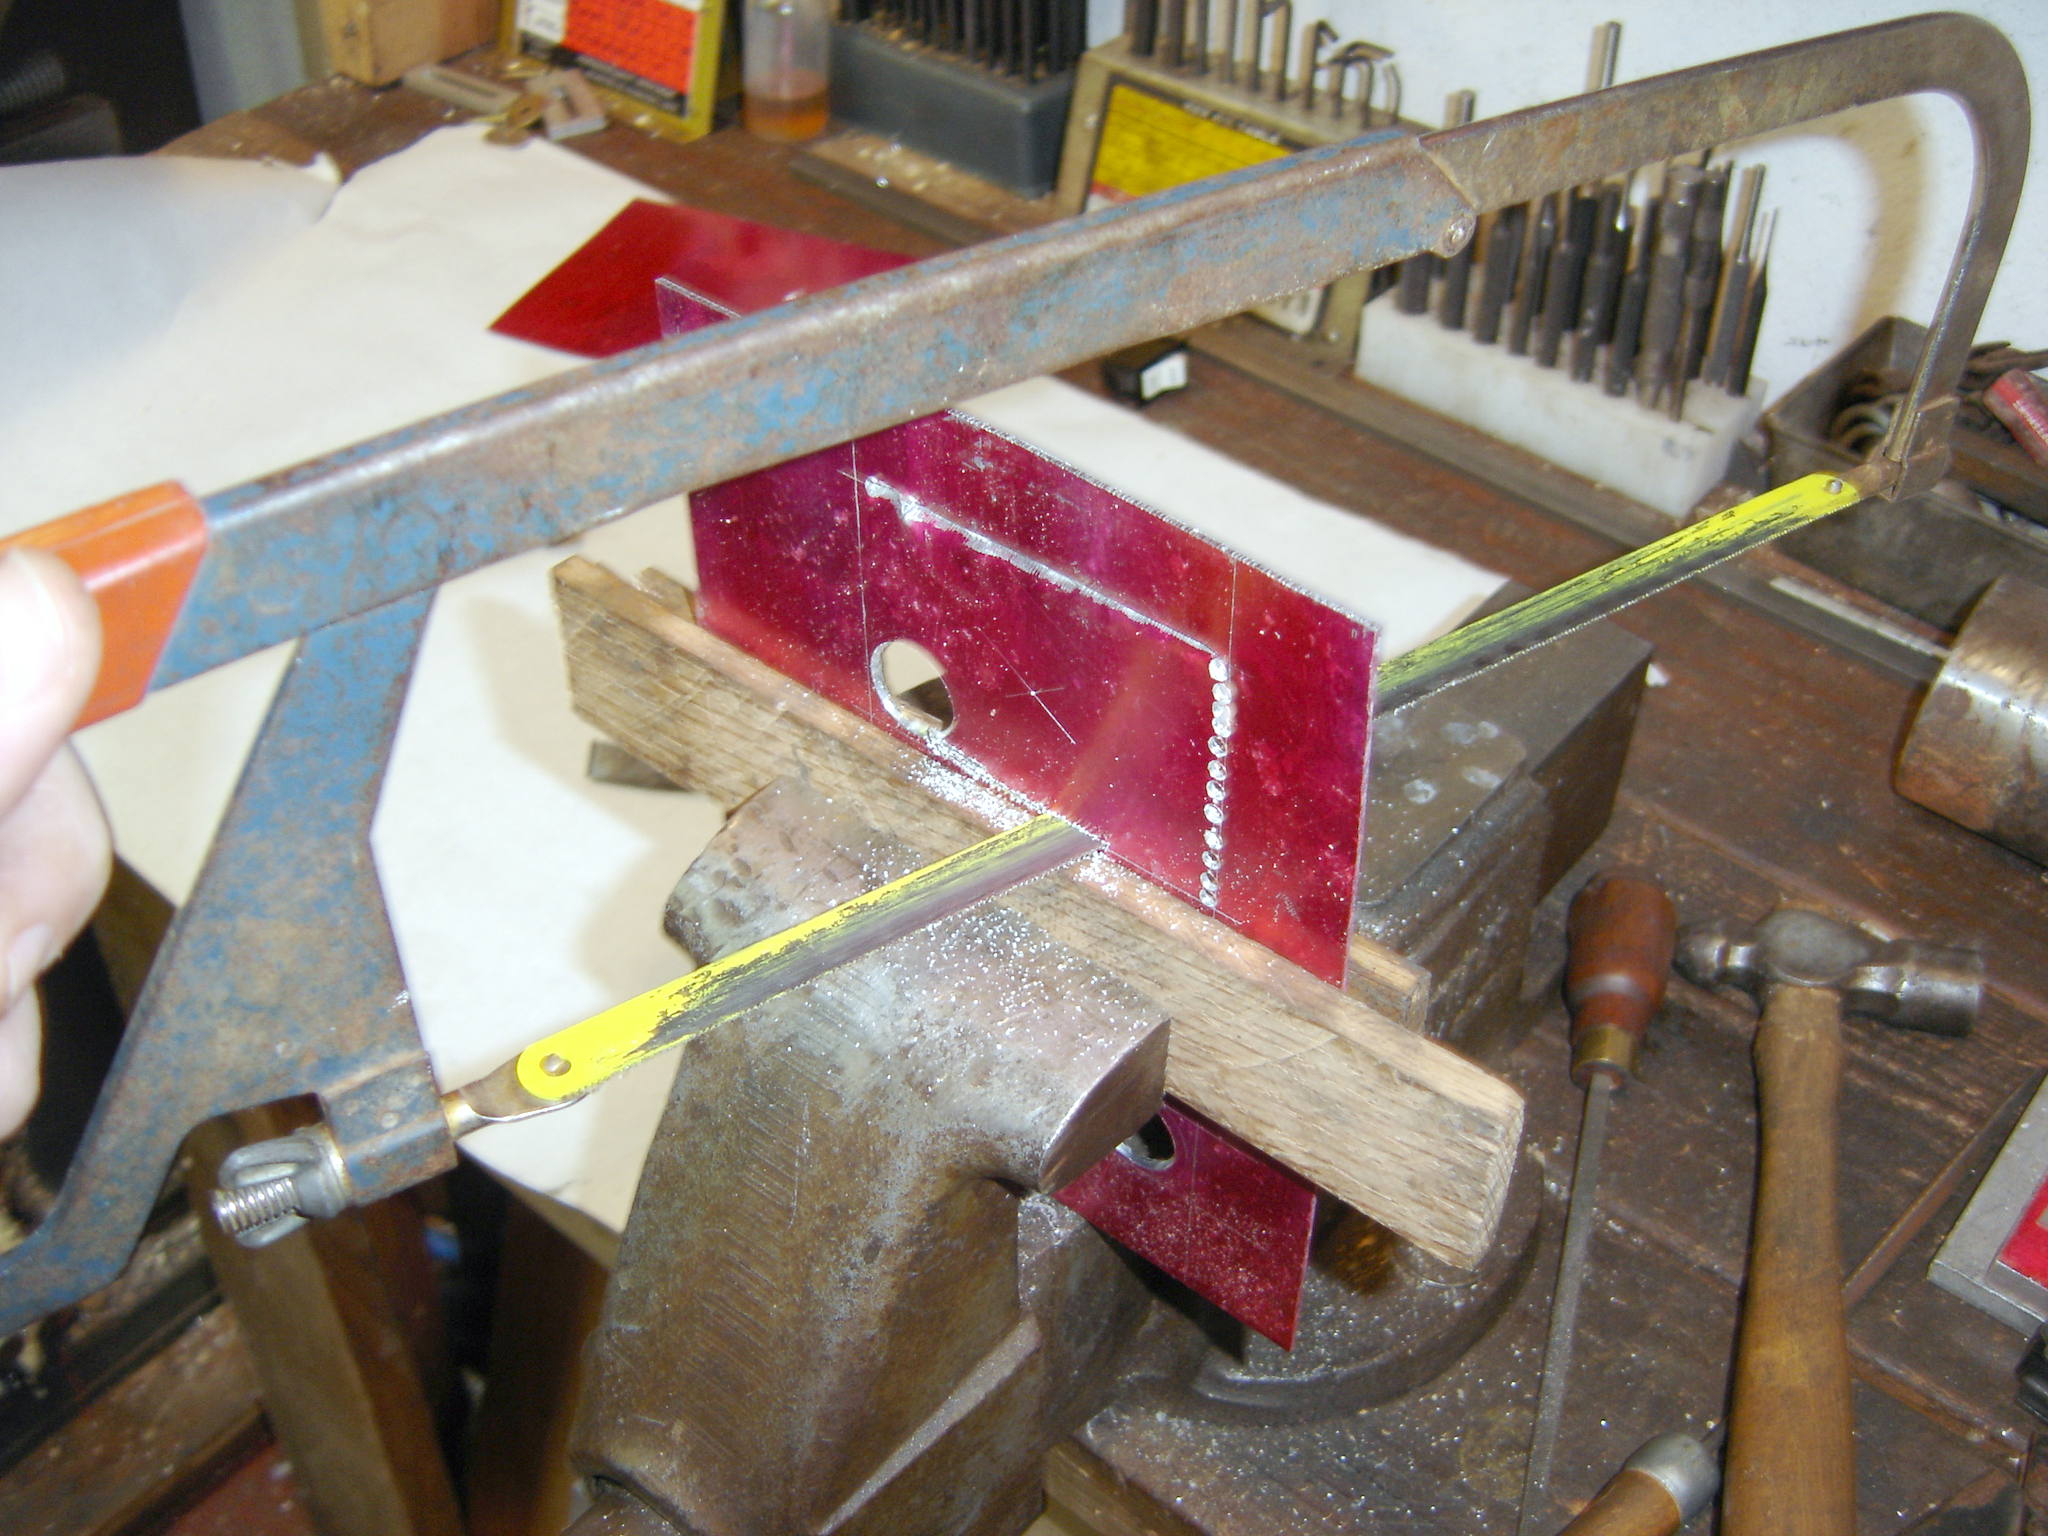
You
can do this with a hacksaw if the hole is big enough, holding the work
in a vise as with the hammer and chisel method. Most hacksaw frames
allow the blade to be set 90 degrees from the frame by turning the
blade clamping screws in their square holes. Picture #9 shows the
hacksaw blade set at 90 degrees to the frame, cutting the side of a
hole.
7)
For small holes you can make a square punch from tool steel (available
in many common sizes), harden and temper with a propane torch, then
hammer the punch into the metal, with a piece of endgrain hardwood on
the other side. This does cause some edge distortion. Picture #10 shows
a square punch being used to nibble along the edge of a hole. This
method requires some upper body strength and a big hammer.

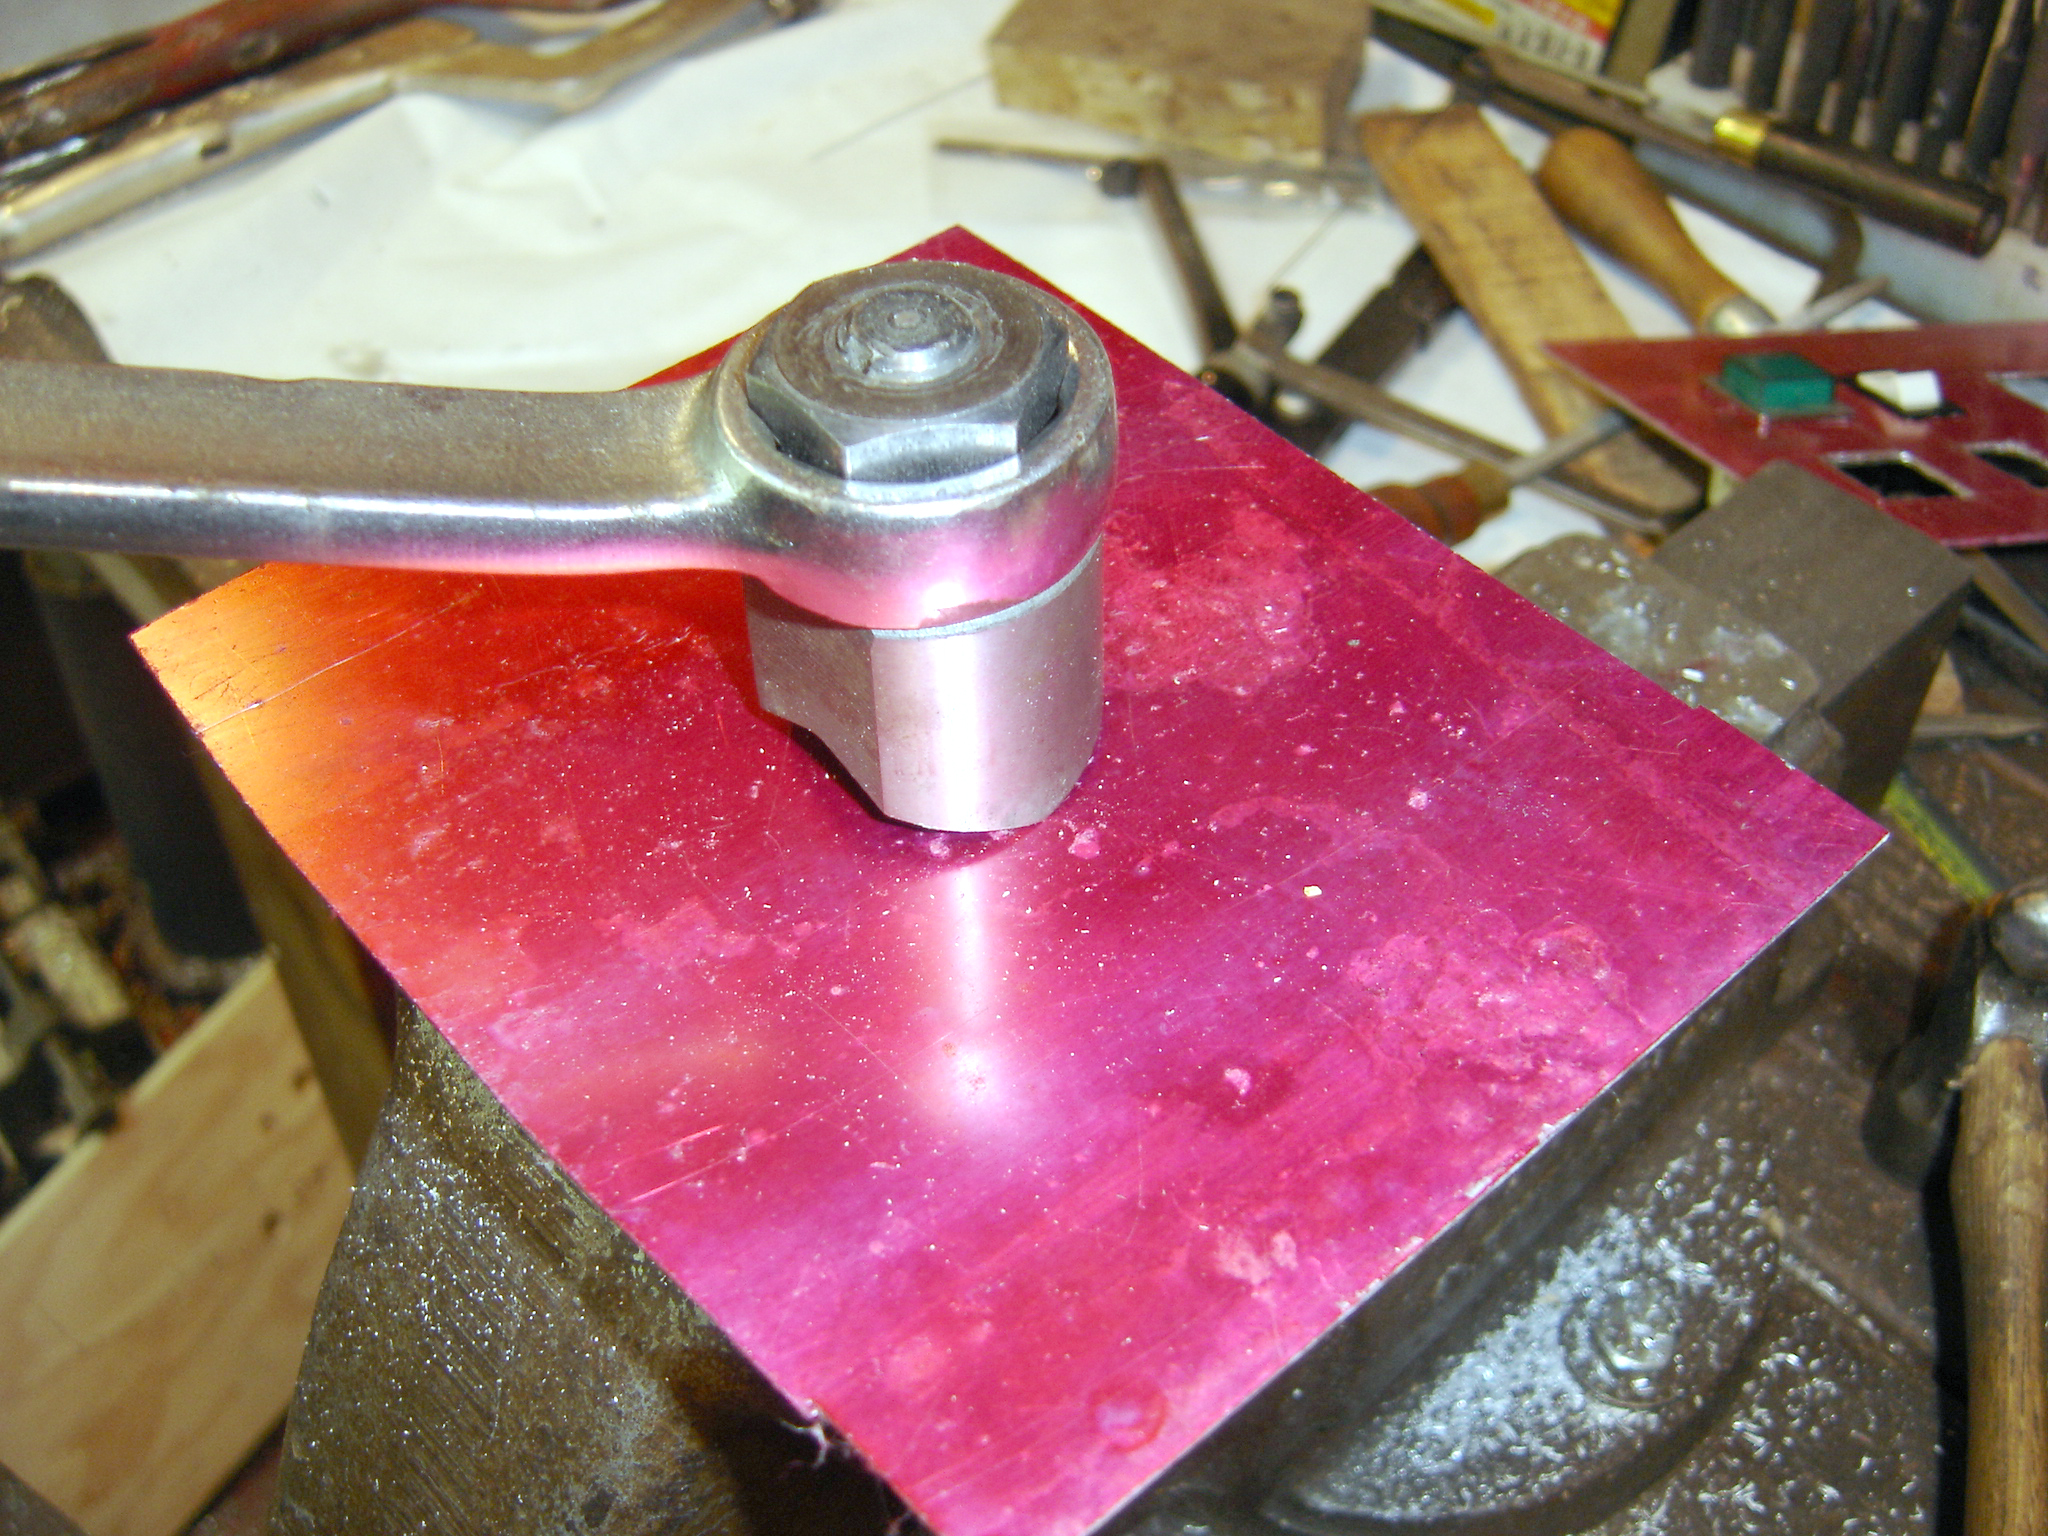
8)
Use a Greenlee Knockout die. This is a punch and die set that cut by
sandwiching the metal between the punch and die, screwing them together
with a bolt that passes through the sheet metal. Knockout dies can be
somewhat expensive but they will cut thicker metal than a hand nibbler
and yield a perfect hole. Hydraulic power packs are also available that
increase the speed and force of the punching operation. Picture #11
shows the parts of a Greenlee die and a hole with straight sides and
rounded edges produced with it. Picture #12 shows the punch in use, you
simply tighten up the bolt until the hole is cut. The punches are
available for most standard electronic component shapes besides square
and round holes. They can be very expensive.

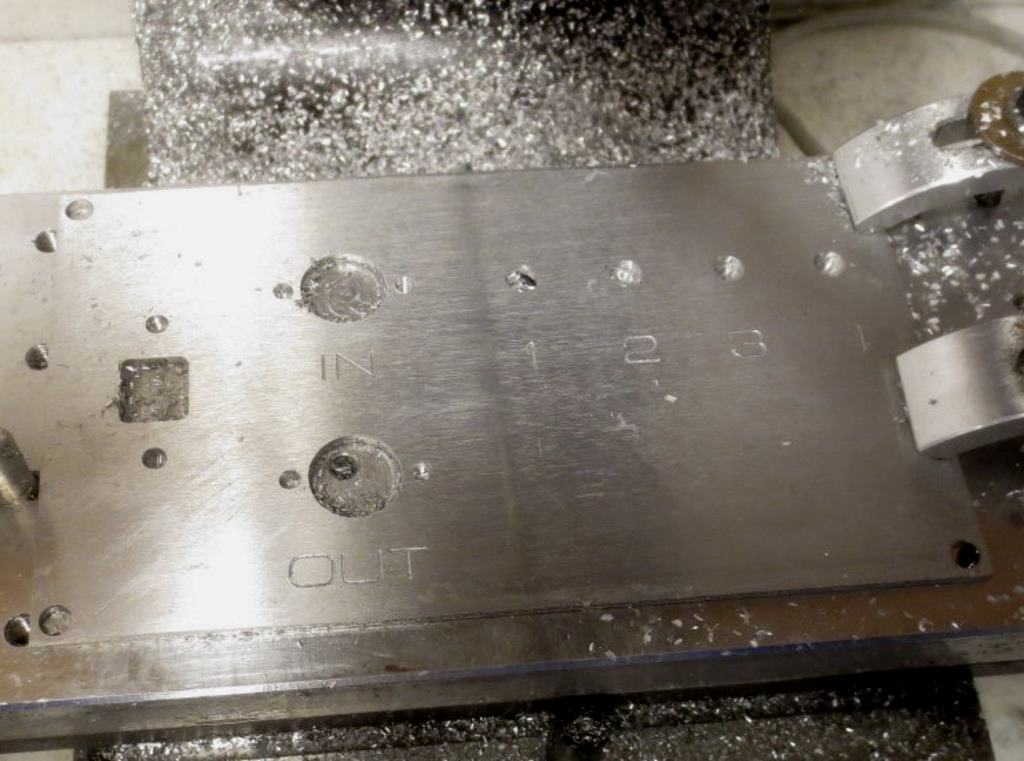
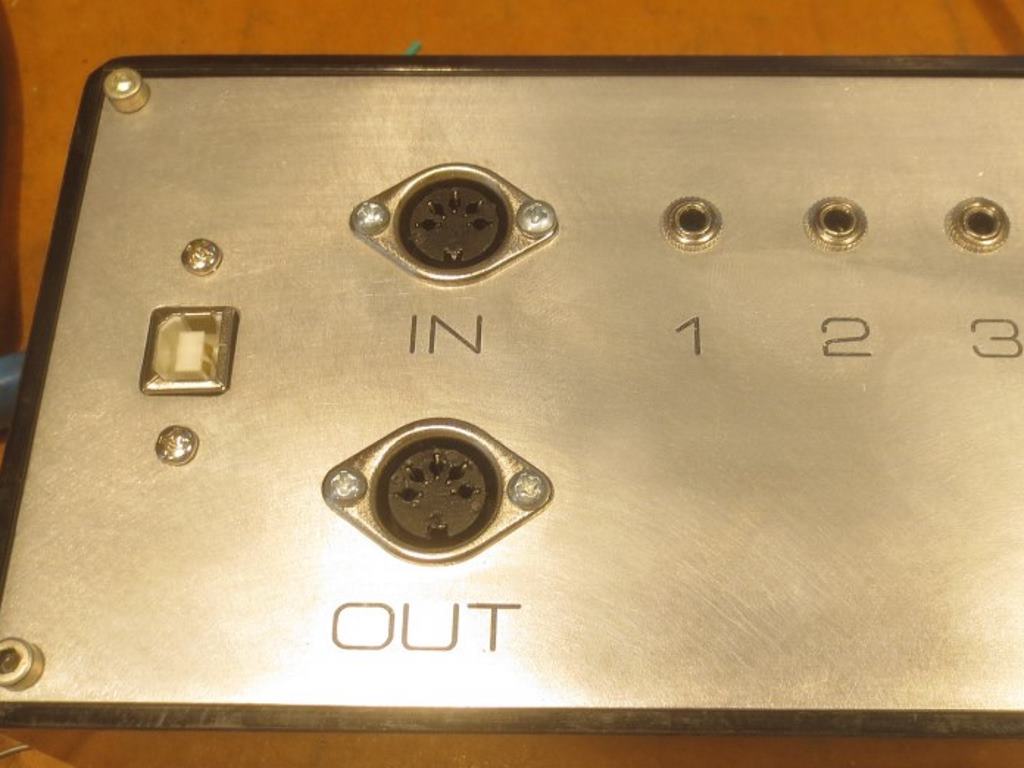
10)
If you have access to a manual or CNC milling machine the hole
can be milled, as shown in pictures #13 and #14 of hole for B type USB
female connector, but that will leave radiused corners that
will
still
have to be filed if the part requires it. You can use double sided tape
or the clamping method
I showed for the drill press to clamp the metal to a sacrificial piece
of aluminum, plywood or MDF.
Further possibilities I'm too lazy to demonstrate right now:
10)
You can make a router template jig and use a small router bit to mill
the hole, again leaving radiused corners that will have to be filed.
Cutting wax will prevent the router bit from loading up with aluminum
chips.
11) You can send the work out to a machine shop that
has EDM (electrical discharge machining), laser or abrasive waterjet
capability. Be warned that this can be expensive. CNC punch presses are
becoming more common.
11.1) Some older shops may have a set of
Watts Brothers square hole drills. These are drills that operate on the
principle of the Reuleaux triangle to wobble the bit around the inside
of a template that fits over the metal. These also leave radiused
corners.
11.2) On thicker metal the machine shop may make the
hole using a square broach, which is in essence a square tapered saw
blade that is forced through a round hole, shaving the sides
progressively larger and squarer. Rotary broaches may also be used to
some advantage as well.
12) A plasma cutter can be used if the
edge is to be dressed later with a file, or if a rough edge is
allowable. An oxy acetylene torch can work on steel (but not
aluminum) and will leave very rough edges.
13) You can use a
cutoff disc in a dremel or foredom tool to cut the edges, keep to the
insides of the edges and be aware that it is easy to overshoot the
corners with this method.
14) If you have access to a blacksmith
shop you can "hot punch" a square hole by using a punch made to the
same size as your square hole and heating the metal up in the forge.
This method only works for steel.
15) And finally, redesign the part to use round holes instead of square
ones.
So
you can see that there are many methods that will work, chances are you
have at least one of the tools that will do the job in hand already.
Back to cartertools.com
Copyright Nicholas Carter 2019.